
Shovel upgrades in Dig Out the Village
Press Tab to open Grandpa’s workshop. Read the stars connected to your starting shovel, then choose an upgrade based on where your last pass through the snow slowed down.
Try it in the demo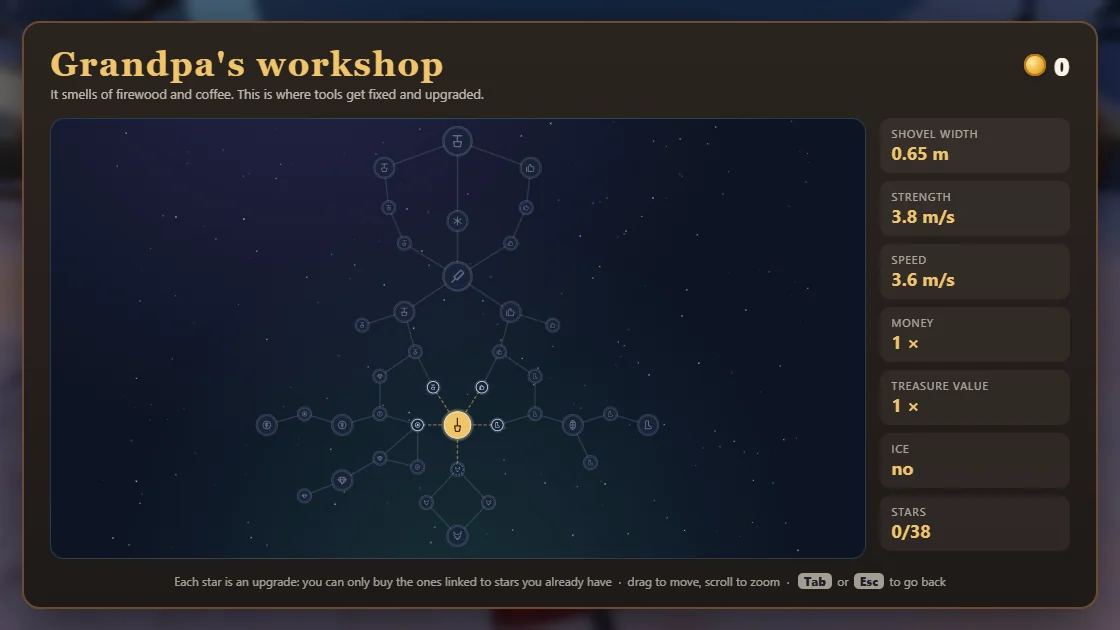
Read the workshop before you spend
The coin balance is in the top right. The lines between stars show which upgrades you can reach from the stars you already own. Drag to see the rest of the tree, and scroll to zoom if several stars are bunched together. Check the stats column before closing the workshop with Tab or Esc.
Start with a short pass along a bank by the square. If you can make a cut but have to keep retracing it, width is a stat worth checking. If progress stops at a solid layer, read the Ice entry before spending more on your current approach.
Use the snow to choose a branch
The cut is too narrow
When you have to overlap several cuts to clear a lane, look along the connected stars for shovel width. After spending, test a fresh strip beside the old lane. Look at the amount of snow left along the sides of each strip.
The same material takes several strokes
Aim at a close section of packed snow and watch the cut. If each stroke removes snow but the depth changes slowly, check the options for strength. A neighboring patch of the same material gives you a fairer comparison after an upgrade.
The blade bounces off ice
If the workshop shows Ice: no, find a softer bank and earn coins there while you work toward an ice-capable tool. Leave a visible corner or an open lane as a marker for the stubborn patch so you can find it again.
Trips across the square take longer than digging
Cut a direct path between your current bank and a landmark. If the route is already clear and travel still dominates the loop, use the workshop’s speed stat to compare your available choices.
A short before-and-after test
- Pick two adjacent strips of the same snow. Note the width of your first cut and how much the visible edge moves after a few strokes.
- Open the workshop and inspect a reachable star that addresses the slow part of the pass. Read its cost and check the relevant stat.
- Return to the other strip. Try the same number of strokes from a similar distance, then compare the two cuts.
If you are still learning how to aim or release the pointer, use the keyboard and mouse controls before making the comparison.